Exercises
These exercises take you from zero to a working Git-and-GitHub setup on your own machine. Work through them in order. Each one builds on the last, but the collaborative exercise at the end is self-contained — even if you get stuck earlier, you can still join in.
If you get stuck at any point, raise your hand, and we’ll come and help.
Before you start
Make sure you have:
- Git installed — open a terminal and run
git --version. You should see a version number. - A GitHub account — if not, create one at github.com
- GitHub Desktop installed (recommended for beginners) — desktop.github.com
- If you’re following the command-line route: install the GitHub CLI (
gh) as described on the setup page - The example project folder — download
example.zip, unzip it somewhere you can find it (e.g. your Desktop). It contains a small R project: a dataset, three scripts, and a README.
Both paths are shown throughout. Pick one and stick with it for the exercises — you don’t need to do both. GitHub Desktop is easier to start with; the command line gives you more power later.
You may notice folders called .git or a file called .gitconfig mentioned during the session. These start with a dot, which means they’re hidden by default.
- Mac: press
Cmd+Shift+.in Finder to show hidden files - Windows: File Explorer → View → Show → Hidden items
You don’t need to open these files — just know they exist.
Exercise 0 · Pre-flight check
~5 minutes · 15:00–15:05
A quick check to make sure everything is ready before we dive in.
- Open GitHub Desktop
- Check you’re signed in: go to GitHub Desktop → Settings → Accounts (Mac) or File → Options → Accounts (Windows). You should see your GitHub username.
- If you’re not signed in, click Sign in to GitHub.com and follow the prompts.
Open a terminal (Terminal on Mac, Git Bash on Windows)
Check Git is installed:
git --versionYou should see something like
git version 2.50.1.Check you’re authenticated with GitHub:
gh auth statusIf you get
gh: command not found, go back to the setup page and install the GitHub CLI first. If you seeLogged in to github.com, you’re ready. If not, run:gh auth loginand follow the prompts.
If Git isn’t installed, or GitHub Desktop won’t sign in, flag us now — it’s faster to fix this before the exercises than halfway through.
Exercise 1 · Your first repository
~15 minutes · 15:05–15:20
You’re going to create a new Git repository, copy the example project files into it, make your first commit, make a change, and commit that too.
Step 1: Create a repository
- In GitHub Desktop, go to File → New Repository
- Give it a name — e.g.
admissions-example— and choose where to save it (e.g. your Desktop). GitHub Desktop will create the folder for you. - Leave all other settings as they are and click Create Repository
In your terminal, rename the example folder to
admissions-exampleand move into it:mv ~/Desktop/example ~/Desktop/admissions-example cd ~/Desktop/admissions-example(adjust the path if you unzipped it somewhere else)
Initialise a Git repository:
git init
Git created a hidden .git folder. That folder is the repository — it stores all the history. Your files haven’t changed.
Step 2: Copy your files in and make your first commit
First, copy the project files in:
- Open the unzipped
examplefolder in Finder (Mac) or File Explorer (Windows) - Copy everything inside it into the
admissions-examplefolder you just created
Then, back in GitHub Desktop:
- The files you copied appear in the Changes panel on the left
- Right-click
datain the list and choose Ignore Folder (Add to .gitignore) — GitHub Desktop writes a.gitignorefile anddata/disappears from the list - Right-click
outputsin the list and choose Ignore Folder (Add to .gitignore) —outputs/disappears from the list too - Review the remaining files: you should see
README.md,scripts/, and.gitignore - In the bottom-left, write a commit message:
Initial commit - Click Commit to main
echo -e "data/\noutputs/" > .gitignore
git add README.md scripts/ .gitignore
git commit -m "Initial commit"
✅ Checkpoint: You’ve made your first commit. The files are now tracked by Git.
Your .gitignore file can contain more than just folder names. You can use wildcards to ignore whole categories of file — for example, adding *.log ignores every file ending in .log, wherever it appears in the project.
Mac users: macOS automatically creates hidden .DS_Store files in every folder you open in Finder. They’re harmless but clutter your repository. Add this line to your .gitignore to suppress them across the whole project:
.DS_StoreYou can open .gitignore in any text editor and add lines by hand — one pattern per line. Commit the change afterwards so everyone working on the project benefits from the same rules.
Step 3: Make a change and commit again
- Open
README.mdin a text editor and add one line — anything you like (your name, a note about the project) - Save the file
- Go back to GitHub Desktop — the change appears in the left panel
- Write a commit message describing what you changed, e.g.
Add my name to README - Click Commit to main
Open
README.mdand add a line, then saveStage and commit the change:
git add README.md
git commit -m "Add my name to README"
Step 4: View the history
Click the History tab at the top of the left panel. You should see two commits, each with its message and timestamp.
git log --onelineYou should see two commits listed, most recent first.
✅ Checkpoint: Two commits in the history. You’ve got a working local repository.
Exercise 2 · Push to GitHub
~10 minutes · 15:20–15:30
Your repository only exists on your computer right now. In this exercise you’ll put a copy on GitHub.
Step 1: Create a new repository on GitHub
Skip this step — GitHub Desktop will create the remote repository for you automatically in Step 2.
- Go to github.com and sign in
- Click the + icon (top right) → New repository
- Name it
admissions-example - Set visibility to Private — the data folder exists locally on your machine, and while
.gitignoreprevents it from being pushed to GitHub, Private is safer while you’re learning - Do not tick “Add a README”, “Add .gitignore”, or “Choose a licence” — your local repo already has all of this
- Click Create repository
Step 2: Connect your local repo and push
- In GitHub Desktop, click Publish repository (in the top bar)
- Make sure the name matches (
admissions-example) and it’s set to Private - Click Publish Repository
Copy the two lines GitHub shows you under “…or push an existing repository from the command line”. They look like this:
git remote add origin https://github.com/YOUR-USERNAME/admissions-example.git
git push -u origin main
Run them in your terminal (replacing YOUR-USERNAME with your GitHub username).
Step 3: Check it worked
Go to github.com/YOUR-USERNAME/admissions-example in your browser. You should see your files and commit history.
✅ Checkpoint: Your project is on GitHub.
Notice that data/ and outputs/ are not on GitHub — even though they’re in your project folder. That’s the .gitignore working. Open it to see what’s excluded.
- Open
.gitignoreand add a new line:*.log - Save the file, commit it (
Add *.log to .gitignore), and push - Check that the new commit appears on GitHub
Exercise 3 · The everyday loop
~10 minutes · 15:30–15:40
This is the workflow you’ll use day-to-day: edit a file, commit the change, push to GitHub.
Step 1: Make a change locally
Open any file in the example project and make a small edit — add a comment to a script, fix a typo in the README, or create a new file called NOTES.md.
Step 2: Commit
- The change appears in the left panel
- Write a clear commit message — describe what you changed, not just “changes”
- Click Commit to main
git add .
git commit -m "Your descriptive message here"
Step 3: Push
Click Push origin in the top bar.
git pushStep 4: Verify on GitHub
Refresh your repository page on GitHub. The new commit should appear at the top of the commit history.
✅ Checkpoint: Edit → commit → push. That’s the everyday loop.
git switch vs git checkout
These exercises use git switch, the modern syntax for working with branches (introduced in Git 2.23). Older tutorials and Stack Overflow answers often use git checkout for the same operations:
| Modern | Old |
|---|---|
git switch -c branch-name |
git checkout -b branch-name |
git switch branch-name |
git checkout branch-name |
Both work — if you see git checkout elsewhere, that’s why.
✨ Collaborative exercise · Add your name ✨
~20 minutes · 15:40–16:00
Everyone is going to contribute to a shared repository — the same pattern used in collaborative research and open-source projects.
The repo is at: github.com/ewancarr/brc-git-workshop-2026
It contains one file — names.md — and your job is to add your name to it.
You don’t have write access to the workshop repo, so you can’t push to it directly. Instead you’ll fork it — create your own copy — make your change there, and then open a pull request asking the presenter to merge it in.
Step 1: Fork the repo
- Go to the repo URL above
- Click Fork (top right) → Create fork
- You now have your own copy at
github.com/YOUR-USERNAME/brc-git-workshop-2026
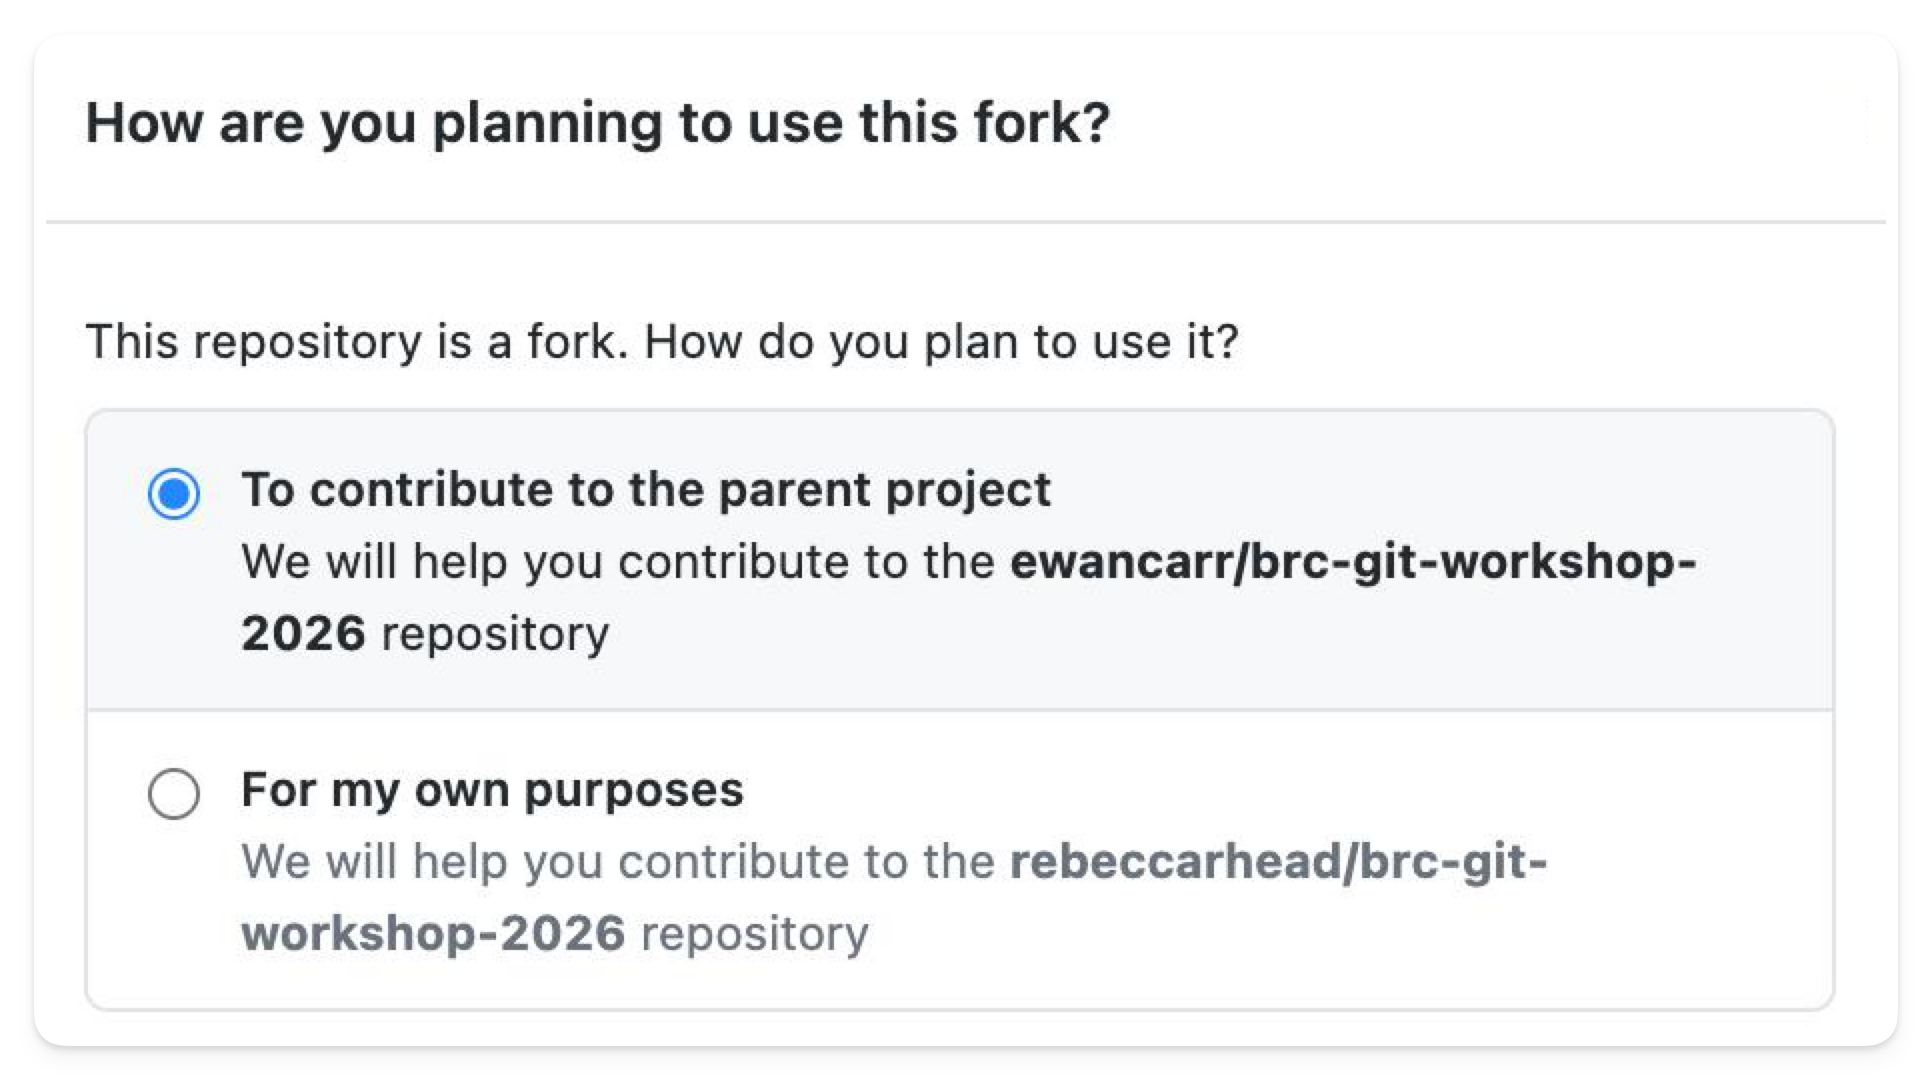
GitHub Desktop may ask “How are you planning to use this fork?”. Keep the default (To contribute to the parent project) and click Continue — this is the right choice for the workshop, as you’ll be opening a pull request back to the presenter’s repo.
Step 2: Clone your fork
- File → Clone Repository
- Find
brc-git-workshop-2026in your repository list (it should appear under your account) - Choose a local path and click Clone
git clone https://github.com/YOUR-USERNAME/brc-git-workshop-2026.git
cd brc-git-workshop-2026
Step 3: Add your name
Open names.md in a text editor (Notepad on Windows, TextEdit on Mac) and add your name on a new line at the bottom:
- Your NameSave the file.
Step 4: Commit and push
- The change appears in the left panel
- Commit message:
Add [your name] - Click Commit to main
- Click Push origin
git add names.md
git commit -m "Add [your name]"
git push
Step 5: Open a pull request
- Go to your fork on GitHub (
github.com/YOUR-USERNAME/brc-git-workshop-2026) - GitHub will show a banner: “This branch is 1 commit ahead of ewancarr:main”
- Click Contribute → Open pull request
- The title will be pre-filled — click Create pull request
✅ Done! Watch the presenter’s screen — your PR will appear in the list, and when it’s merged, your name will be added to names.md live.
“I cloned the original repo, not my fork” Go back and clone from github.com/YOUR-USERNAME/... (your fork), not github.com/ewancarr/....
“GitHub Desktop doesn’t show my fork” Click Refresh in the repository list, or paste the URL manually via File → Clone Repository → URL tab.
“Authentication failed” when pushing Flag a helper — this usually means GitHub Desktop isn’t signed in, or the CLI needs gh auth login.
Exercise 4 · Working with Branches
We probably won’t have time to cover this during the session, but it’s here if you’d like to try it in your own time — or if you finish the earlier exercises early and want something extra to explore.
Branches let you try something out without touching your working code. You create a branch, make changes there, and merge it back into main when you’re happy. For this exercise, use the repository you created in Exercises 1 and 2. You’ll need to switch back to it first.
Step 1: Create a branch
Go to Branch → New Branch. Name it my-experiment and click Create Branch. GitHub Desktop will switch you to the new branch automatically.
git switch -c my-experimentStep 2: Make a change and commit
Make any small edit to a file — add a comment to a script, add a line to README.md, anything.
Commit the change as normal — write a message and click Commit to my-experiment.
git add .
git commit -m "Experiment with a change"
Step 3: Switch back to main
Use the branch menu at the top of the window to switch back to main.
git switch mainNotice that your change has disappeared from the files. It’s safe on the branch — it just isn’t on main yet.
Step 4: Merge the branch into main
- In the menu bar (Mac) or menu (Windows), go to Branch → Merge into Current Branch
- Select
my-experimentfrom the list - Click Create a merge commit
git merge my-experimentYour change is now on main. Check the history — you’ll see the commit from the branch has landed there.
Step 5: Push and view on GitHub
Click Push origin in the top bar, then click View on GitHub to see your merged branch on GitHub.
git pushThen go to https://github.com/YOUR-USERNAME/admissions-example to see the result.
✅ That’s the branch workflow: create → commit → switch back → merge → push. On a real project you’d do this whenever you want to try something without risking your working code.
Once a branch is merged you can delete it — it’s done its job.
git branch -d my-experimentIn GitHub Desktop: Branch → Delete Branch.