Git for people who’ve been meaning to learn Git (but haven’t yet)
NIHR Maudsley BRC
23 April 2026
Department of Biostatistics & Health Informatics
King’s College London
Goals for today
- A clear mental model of Git — what it is, what a repository is, and how GitHub fits in.
- Your first repository — how to start tracking a project without the workflow feeling mysterious.
- A real commit pushed to GitHub — enough confidence to try this on your own work.
14:00–15:00 Concepts and demonstrations
15:00–16:00 Practice
Your answers to the survey…
43%
have never used Git
83%
use filenames to version their work
83%
use R in their analysis workflow
52%
use a Mac
45%
want the fundamentals
42%
want practical workflow help
39%
mention GitHub and collaboration
55%
main blocker is not knowing where to start
What is Git?
Git is software that tracks changes to your files.
Without version control
- File names become versions:
analysis_final_v4_Ewan.R,THIS_ONE_WORKS.R - No record of what changed or why
- Collaboration (e.g., via email) creates diverging copies with no easy way to merge them

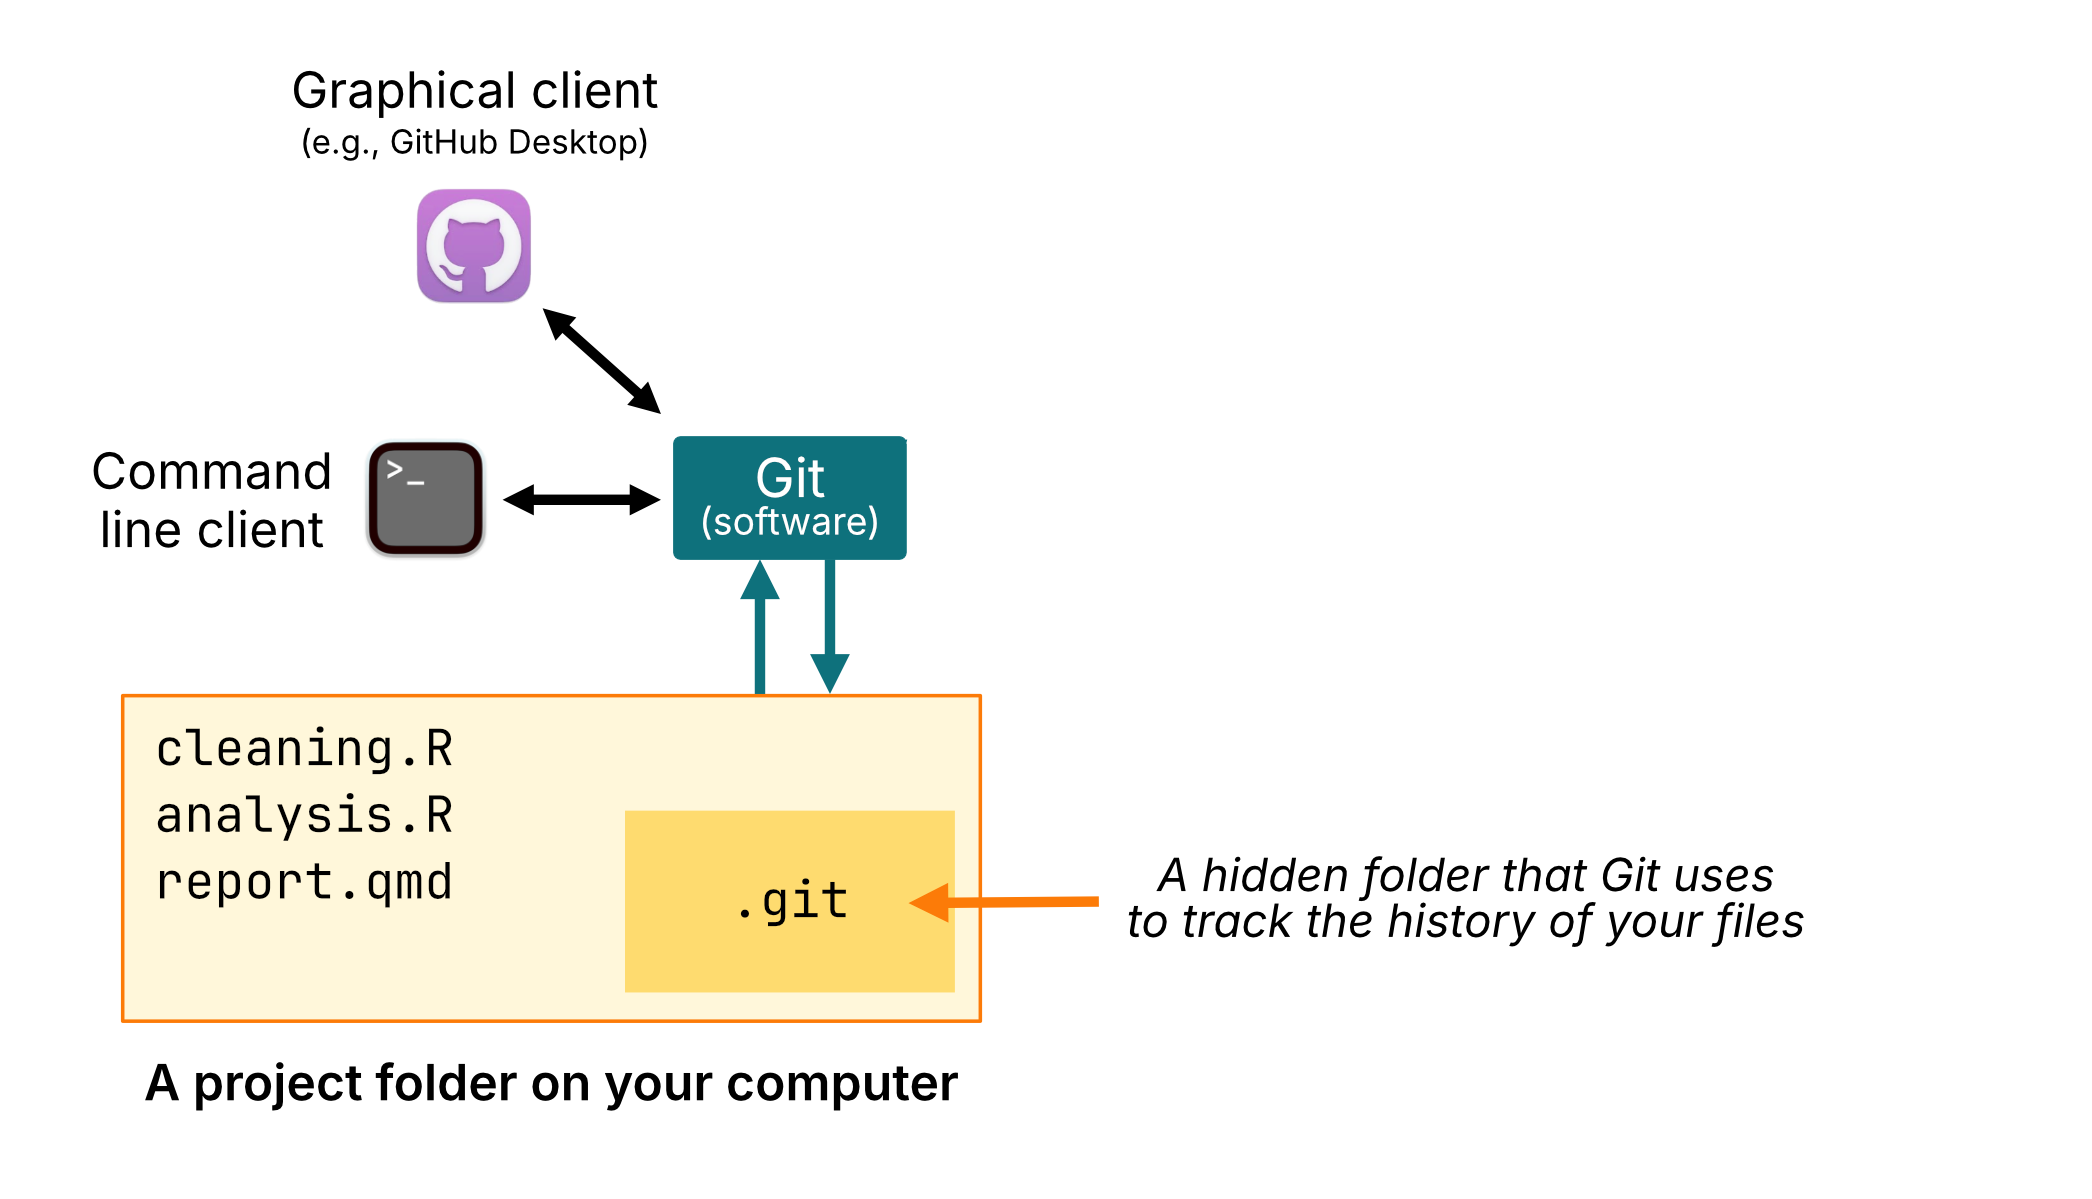
- Git
- Software on your computer that tracks changes to files and records project history.
- Repository
-
A project folder that Git is watching, including the hidden
.gitfolder that stores the history. - GitHub
- A website that hosts repositories online for backup, sharing, and collaboration.
You can use Git entirely locally, without GitHub.
How you interact with Git
- Through the command line:
- Through a graphical client (e.g., GitHub Desktop, Tower).
Different interfaces, but doing the same thing underneath.
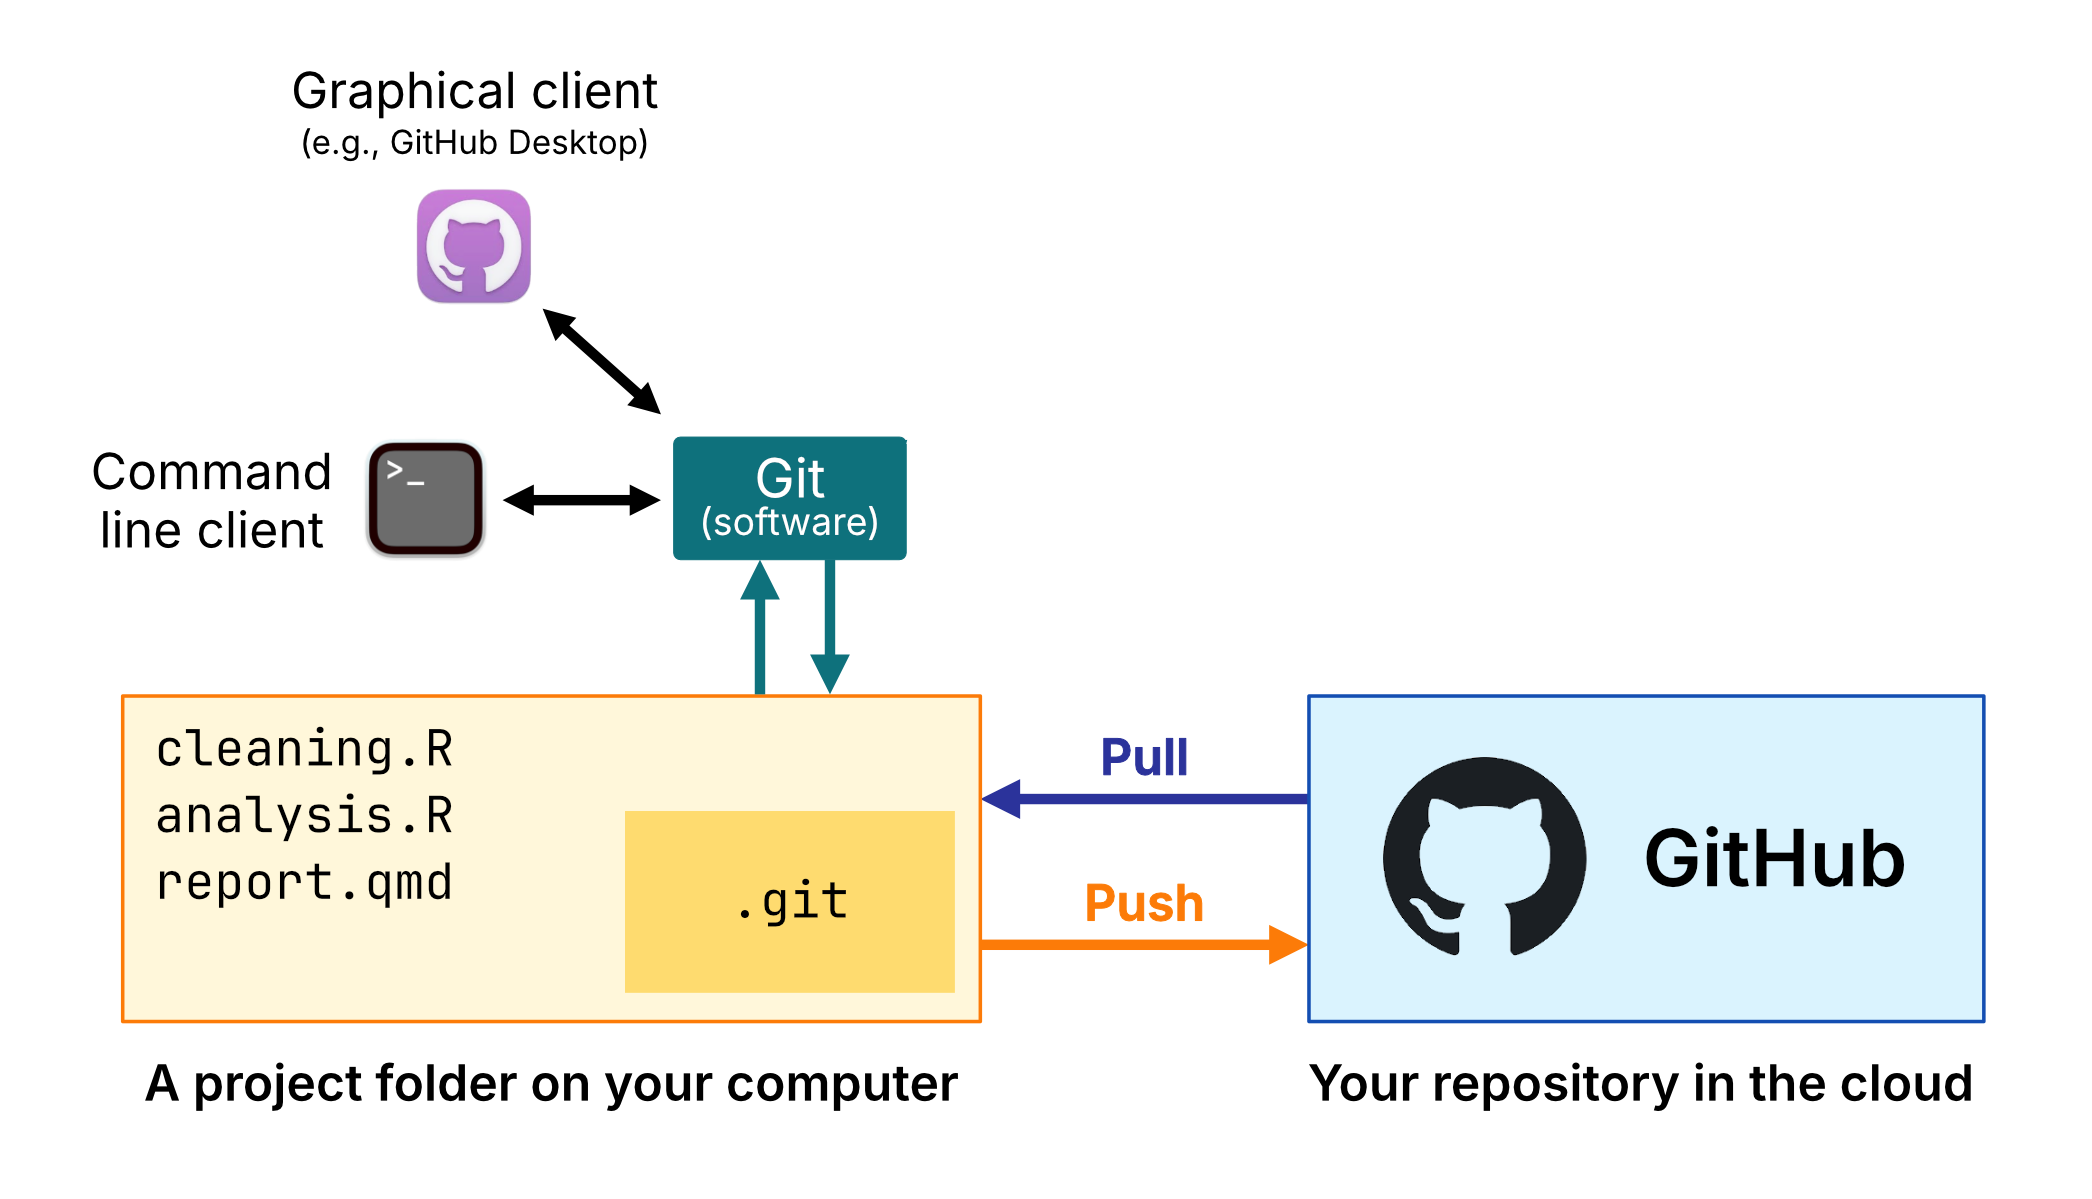
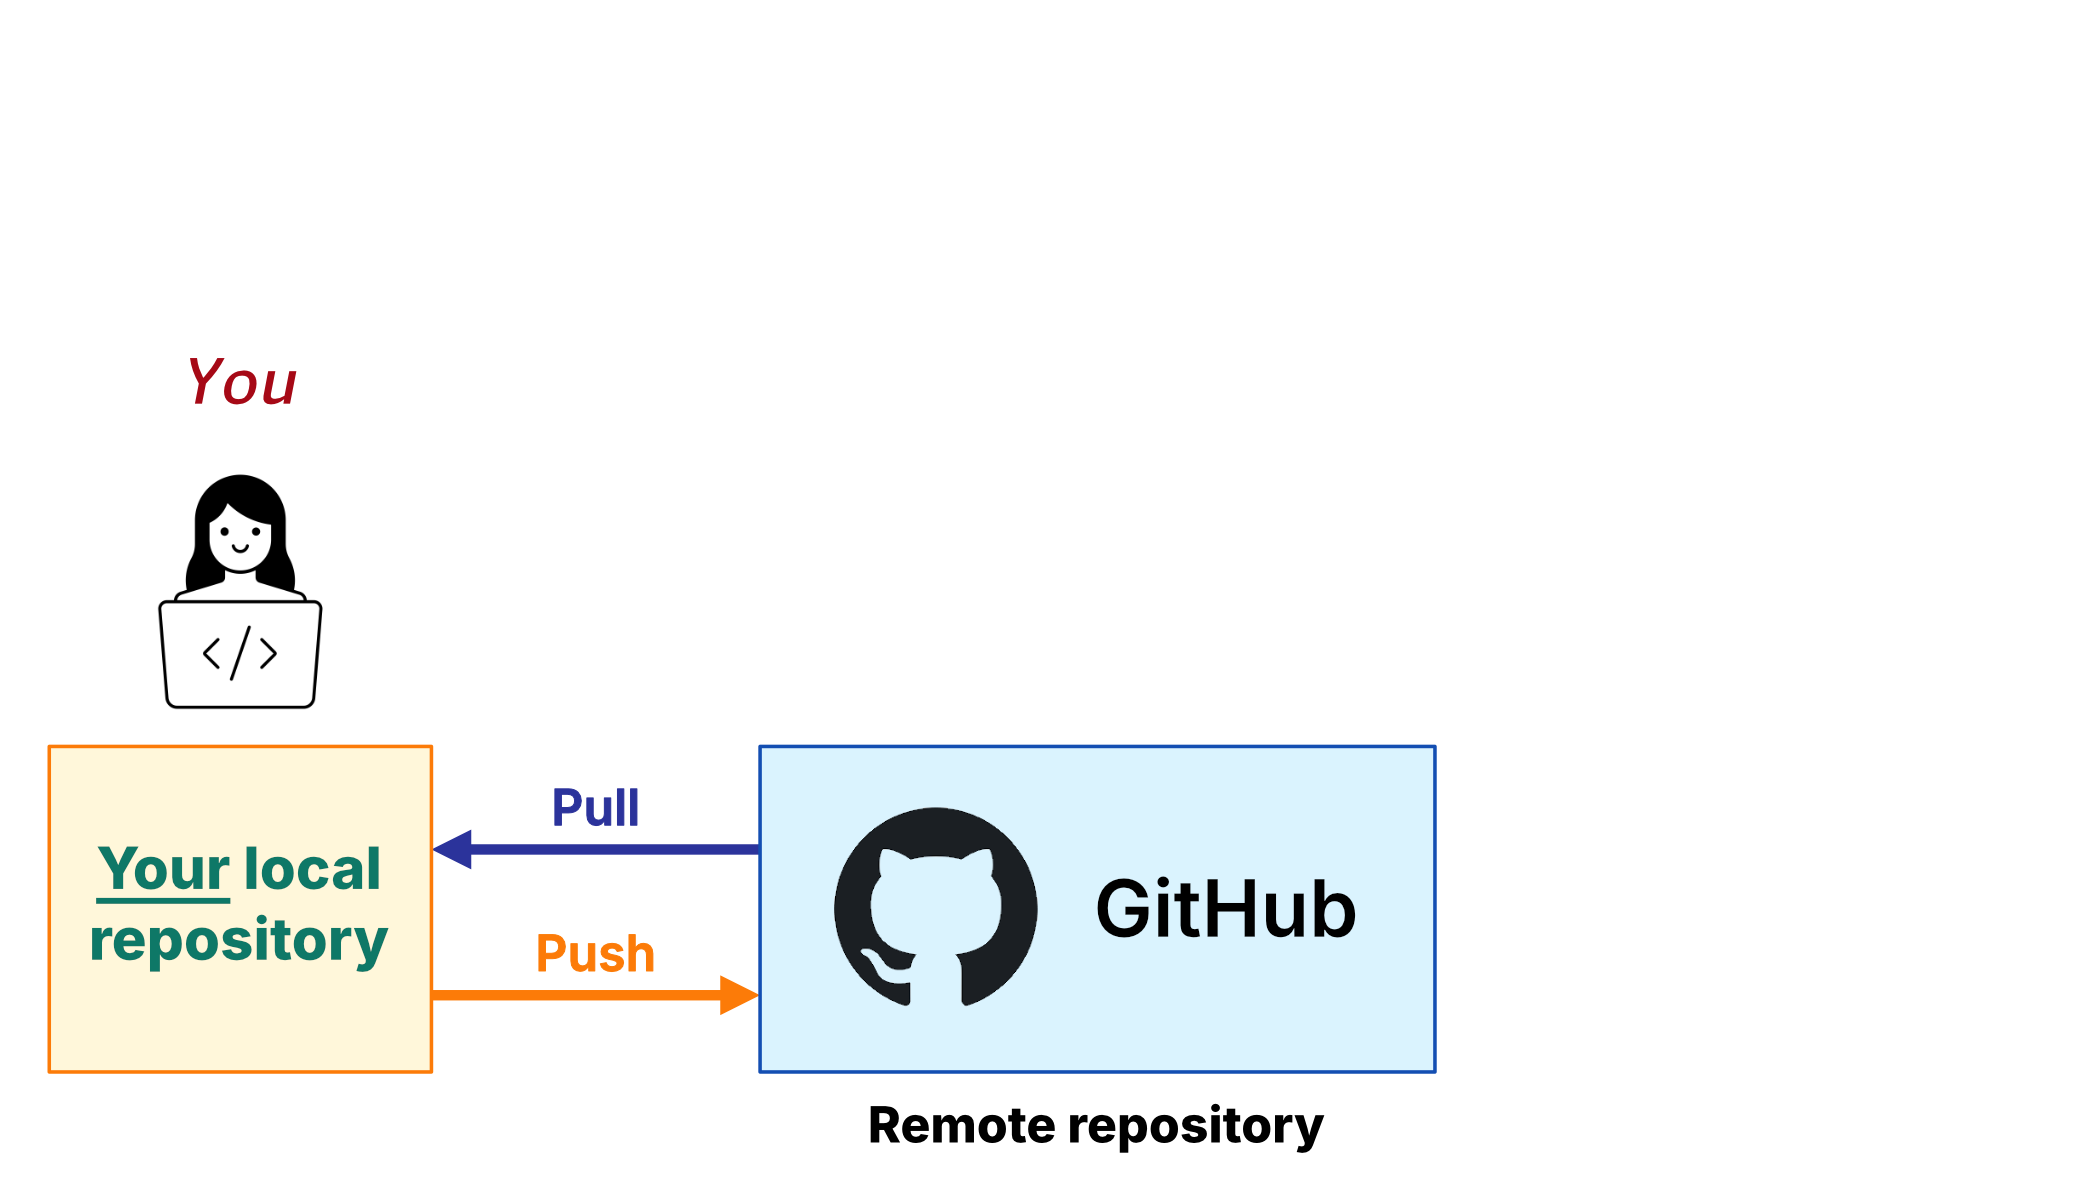
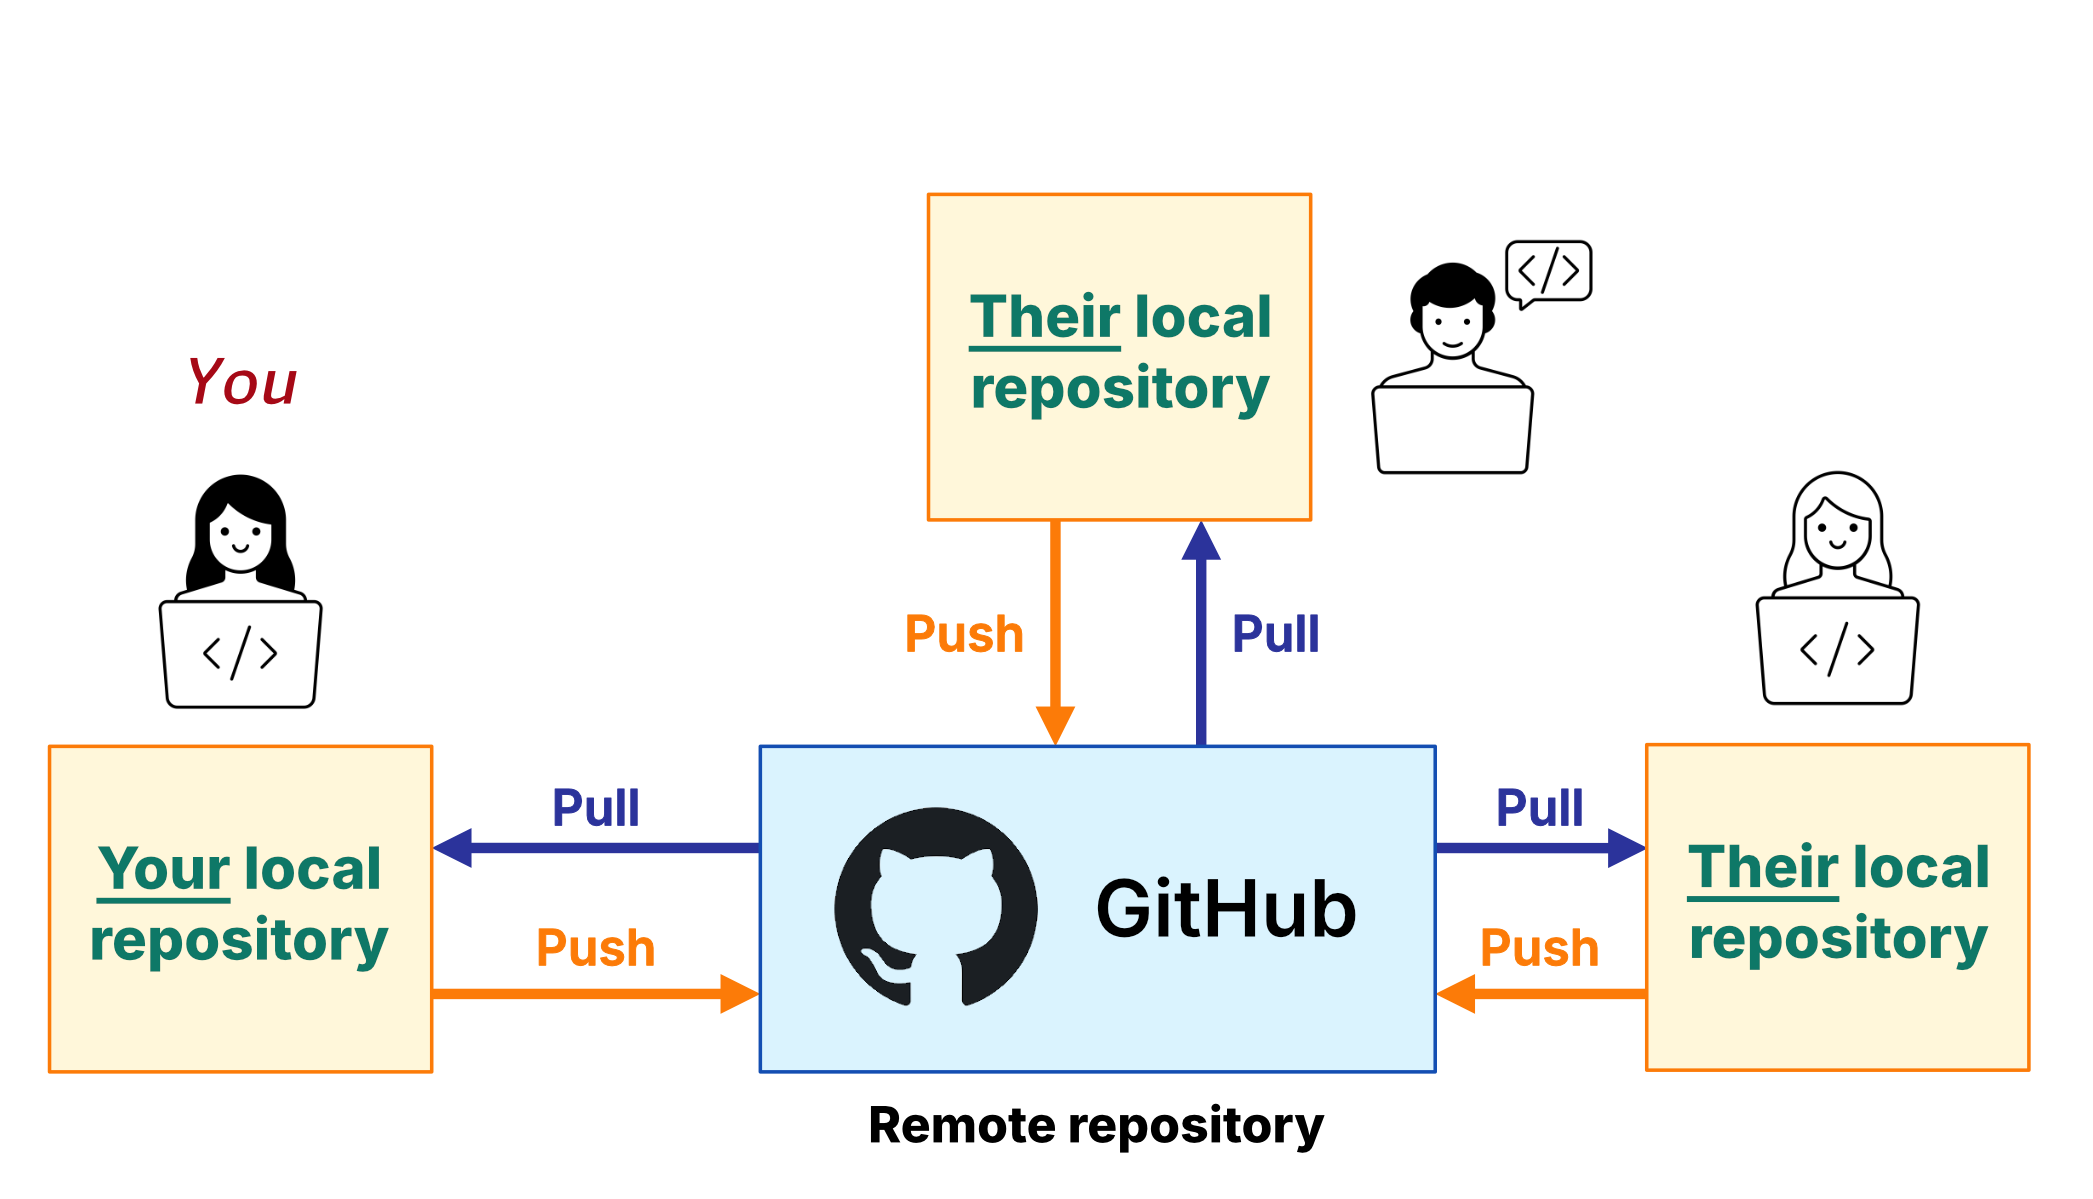
Local vs. remote repositories
- Local repository
- The working copy on your computer. You can edit files and make commits offline.
- Remote repository
- A linked copy hosted online (e.g., GitHub), containing the complete history of your repository.
We can send and receive changes from the remote. This is referred to as “pushing” and “pulling”.
Why Git?
1. Complete history
- Every change annotated with a message
- Go back to any earlier version
- Compare exactly what changed between two points
- Remember why you made decisions months later
2. Collaboration
- One repository, multiple contributors
- Everyone works locally, shares changes via the repository
- Git records who changed what, and when
- Pull, edit, commit, push
3. Open research
- Sits alongside a paper or report
- Readers can inspect the files,
README, and history - Start private, make public when ready
- Funders and journals increasingly expect this

How it works
Working with a local repository
Tracked vs. untracked
Git only watches files you’ve added. Everything else is invisible to it.
Commit
A saved snapshot of your project — with a message, author, and timestamp.
Staging
Pick which changes go into the next commit — so each one is deliberate.
The workflow
Git creates the hidden .git folder inside your project. Your files stay where they are.
The workflow
Copy your project files in, then tell Git which ones to watch.
The workflow
Git calls this staging. You are choosing which tracked files should go into the next commit.
The workflow
Your first commit gives the repository a starting point and a message explaining what it contains.
The workflow
Edit a tracked file and save it on your computer. Git notices the change and waits for you to decide what to do next.
The workflow
This is staging again. Choose which edits should go into the next commit.
The workflow
Make another commit with a clear message. From that point on, the pattern is edit, choose, commit, repeat.
The workflow
Continue working, and repeat the process as needed.
A commit gives you a saved version of your staged changes, together with its message, author, and timestamp.
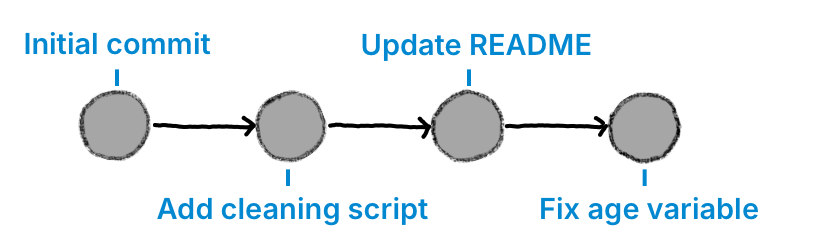
- Browse the timeline of saved versions.
- Compare exactly what changed between two points.
- Recover an earlier version safely if something goes wrong.
DEMONSTRATIONSeeing the workflow in action
We’ll work with a downloaded example/ project folder, which includes:
README.md- A short description of the project
scripts/clean.R- The cleaning script
data/admissions.csv- The raw data — present locally, but we’ll tell Git to ignore it
outputs/model_predictions.csv- Generated outputs — also ignored
Our goal is to:
- Create a new repository in GitHub Desktop
- Copy the project files in and ignore
data/ - Make two commits.
Demo 1 · Initialise and first commit
admissions-example → Create Repository
example/ into the new admissions-example folder
data → Ignore all files in data/; repeat for outputs — GitHub Desktop writes .gitignore automatically
README.md, scripts/, .gitignore
Demo 1 · Make a change and commit again
scripts/clean.R, add a comment at the top, save
Demo 1 · View the history
How to do this on the command line?
Initialise, add, and commit:
Make a change to scripts/clean.R, then:
What if you already have a project folder?
Use git init to initialise the repository, then open it in GitHub Desktop:
Then in GitHub Desktop: File → Add Local Repository → choose the folder.
From there, review the Changes panel, ignore anything that shouldn’t be tracked, and make your first commit — exactly as we just did.
Warning
If you use File → New Repository inside a folder that already contains files, GitHub Desktop will stage everything automatically. That is usually not what you want.
DEMONSTRATIONGoing online
Going online
The repository we just created only lives on our computer.
We can work entirely offline, committing changes and building up a history using Git.
However, to share it with others, we need to connect it to a remote repository.
We’re using GitHub, but there are several online hosting platforms for Git repositories (e.g. GitLab, Bitbucket).
The remote repository is a linked copy of your local repository that is hosted online (e.g., GitHub).

Going online adds a shared copy of the repository. It does not replace the local one on your computer.
Connect, then push
- Connect your local repository to the GitHub repository that will hold the online copy.
- Push your existing commits so GitHub receives that history and creates the remote copy.
- After that, future pushes update the same remote repository, and pulls bring those shared changes back to your computer.
Tip
GitHub Desktop wraps this into a simple publish flow. The command line shows the same ideas as separate steps.
Signing in to GitHub
GitHub Desktop
Windows
File → Options → Accounts
Mac
GitHub Desktop → Settings → Accounts
Command line
Use the GitHub command line client:
gh auth loginOr follow GitHub’s SSH setup guide
Full instructions are on the workshop setup page.
Demo 2 · Create a repository on GitHub and connect it
admissions-example, set it to Private
.gitignore, and licence unticked
Demo 2 · One more commit → push → watch it arrive
README.md locally and save
🧠 Mini quiz

Best practices
What should go in a commit?
- A commit should represent one coherent change.
- Think “what did I just do?”, not “which file did I edit?”
- A single commit will often include changes across multiple files
If you can describe the change in one sentence, it’s probably a good commit.
Writing good commit messages
A commit message should explain what changed and why.
Short summary line describing what changed

An optional longer description, explaining why it
changed and adding any important details.
The description should explain the problem being addressed, the approach taken, and any assumptions or trade-offs involved.
🚀 Good examples
Add cross-validation to model pipeline
Implements 5-fold CV for logistic regression model. This replaces the previous single train/test split to reduce variance in performance estimates.
Check for missing values before model fitting
Introduces a check to stop execution if key variables contain missing values. This prevents silent failures and unexpected model behaviour.
🔥 Bad examples
Monday's workChangesUpdateFinal versionFixFix, properly this time
Use .gitignore to ignore files you don’t want tracked
Create a file .gitignore in the project folder. Use this file to omit files you don’t want under version control. For example:
- Yes: Scripts, code, READMEs, manuscript text, config files.
- No: Raw or derived data, large outputs, model files, credentials, API keys
Never commit patient data.
Add any data folders to your .gitignore file before any data files are added.
Warning
Once sensitive data is committed to a public repository, deleting the file later is not enough.
Git history can still contain the earlier version, so pushing first and deleting later does not undo the exposure.
March 2026:
Researchers using UK Biobank data committed data folders locally, pushed them to GitHub, and then exposed them publicly.

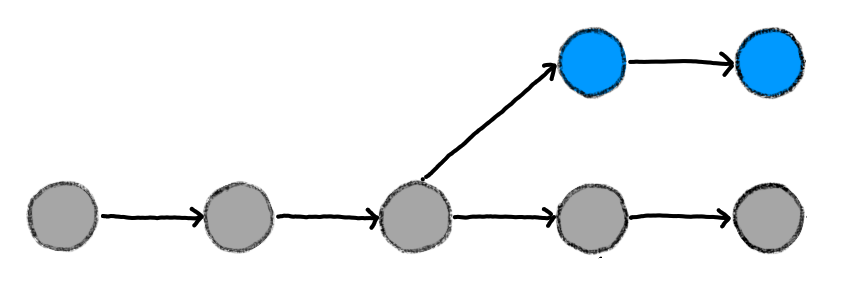
Branches
A branch is a separate line of work within the same repository.
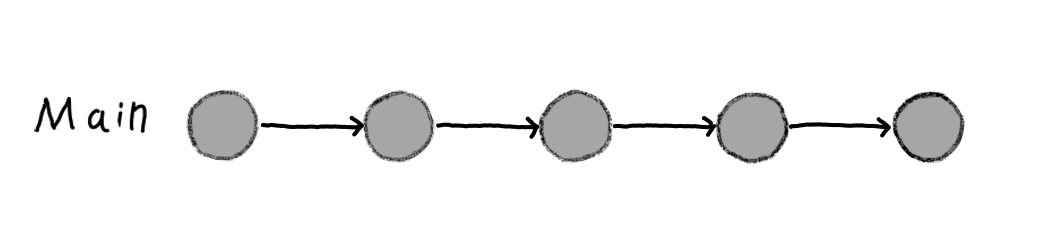
Until now, we’ve been thinking about a single history. This is usually called the main branch.
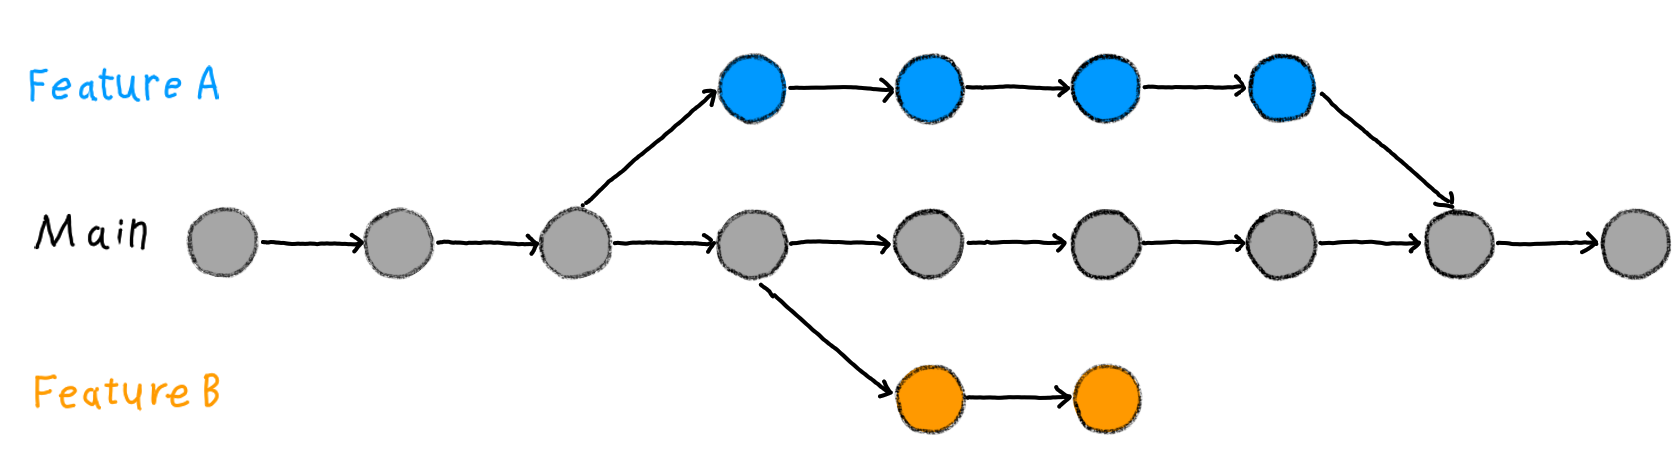
Git lets us have multiple branches:
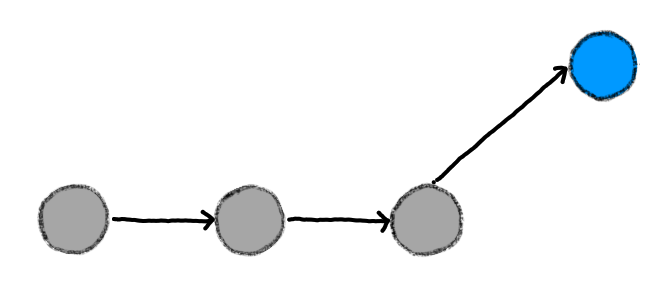
How? First, create and switch to a new branch
On the command line, use git switch -c to create a new branch and move to it immediately. Here, I’ve named the branch add-figure-2:
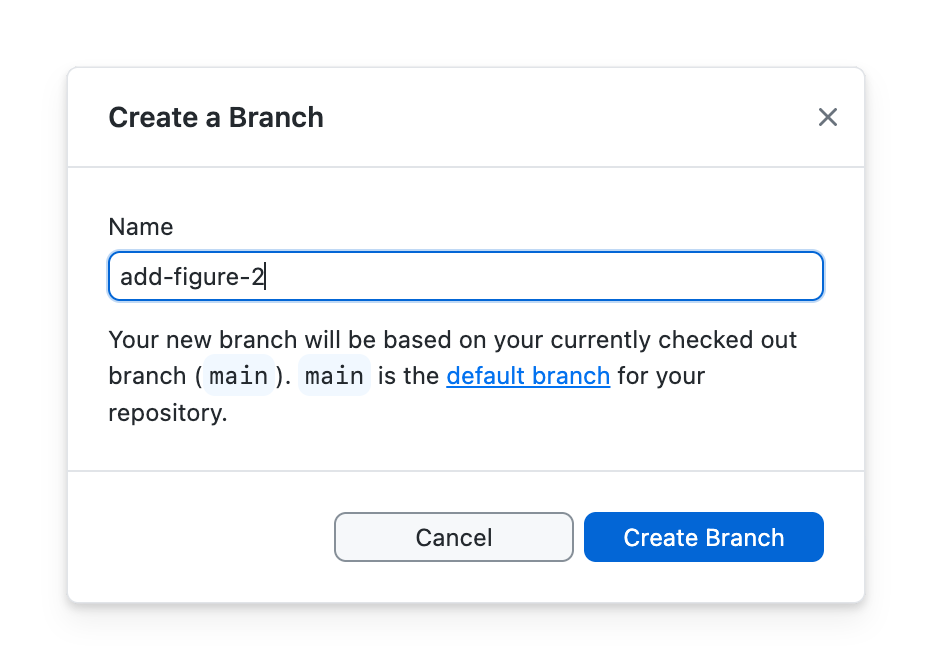
On GitHub Desktop, choose Branch→New Branch…
Note that new commits now go on that branch, not main.
When you switch branches, your files switch too
- Git updates your working directory to match the branch you switched to.
- Your work on the other branch is still there in its commits.
- To go back, switch back:
When you’re done, delete or merge back
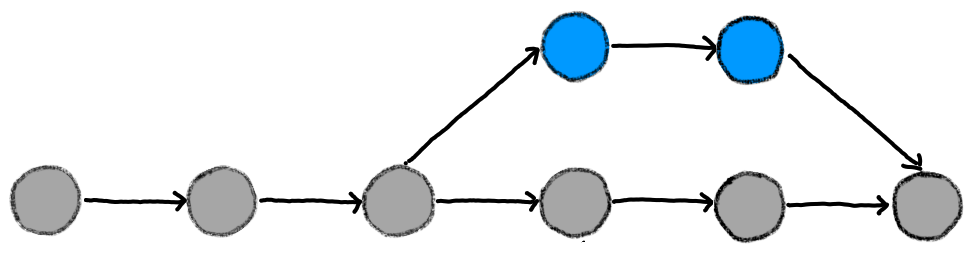
Branches are a safe place to experiment
If it works, you can merge it back into the main branch. Merging means bringing the commits from that branch into the main line of the project
If not, you delete the branch and continue on main.
Demonstration · Switch to a branch and back again
git switch -c add-readme-note
README.md, save, and commit the change
git switch main
git switch add-readme-note
Collaboration
Everyone has a local copy. Push and pull to the remote.
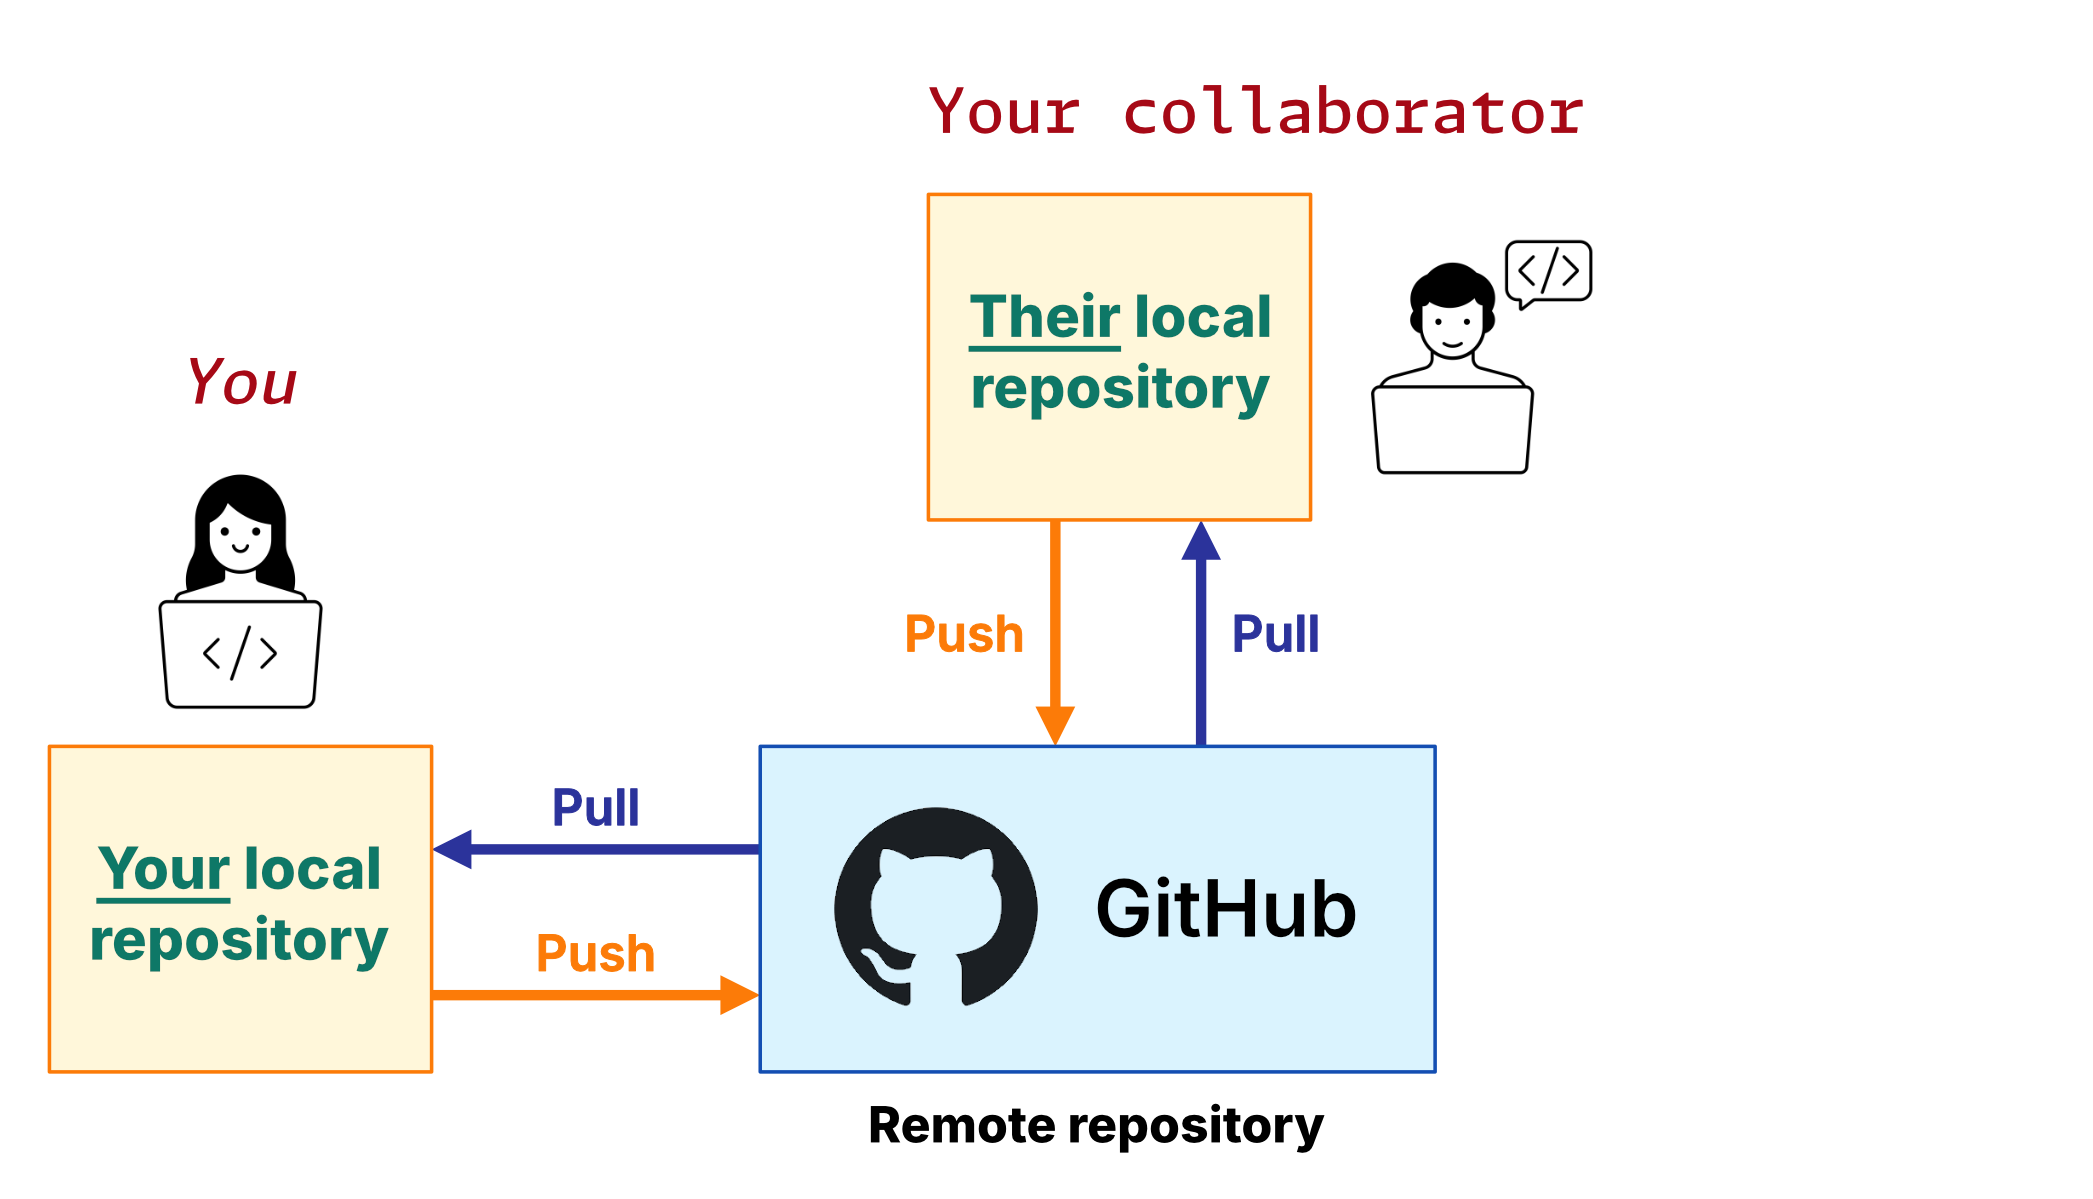
Everyone has a local copy. Push and pull to the remote.
Use feature branches when collaborating
Never work directly on main. Create a feature branch for each piece of work.
Example branch names
cleaning-fix-missing-valuesadd-figure-2update-inclusion-criteria
Why?
- Keeps
mainstable - Lets you work safely without breaking anything
- Makes it easier to review changes
Pull requests
A pull request is a way of asking to merge a branch into main.
- Create a new branch (e.g.
implement-xgboost-model) - Make and commit changes on that branch
- On GitHub, open a pull request to merge into
main
A pull request allows others to review and approve your code, or suggest changes. Pull requests are also referred to as PRs.
A simple workflow to follow
When you start work
- Pull the latest version of
main - Create a new feature branch
While working
- Make small commits with clear messages
When finished
- Push your branch to GitHub
- Open a Pull Request
- Get it reviewed and merged
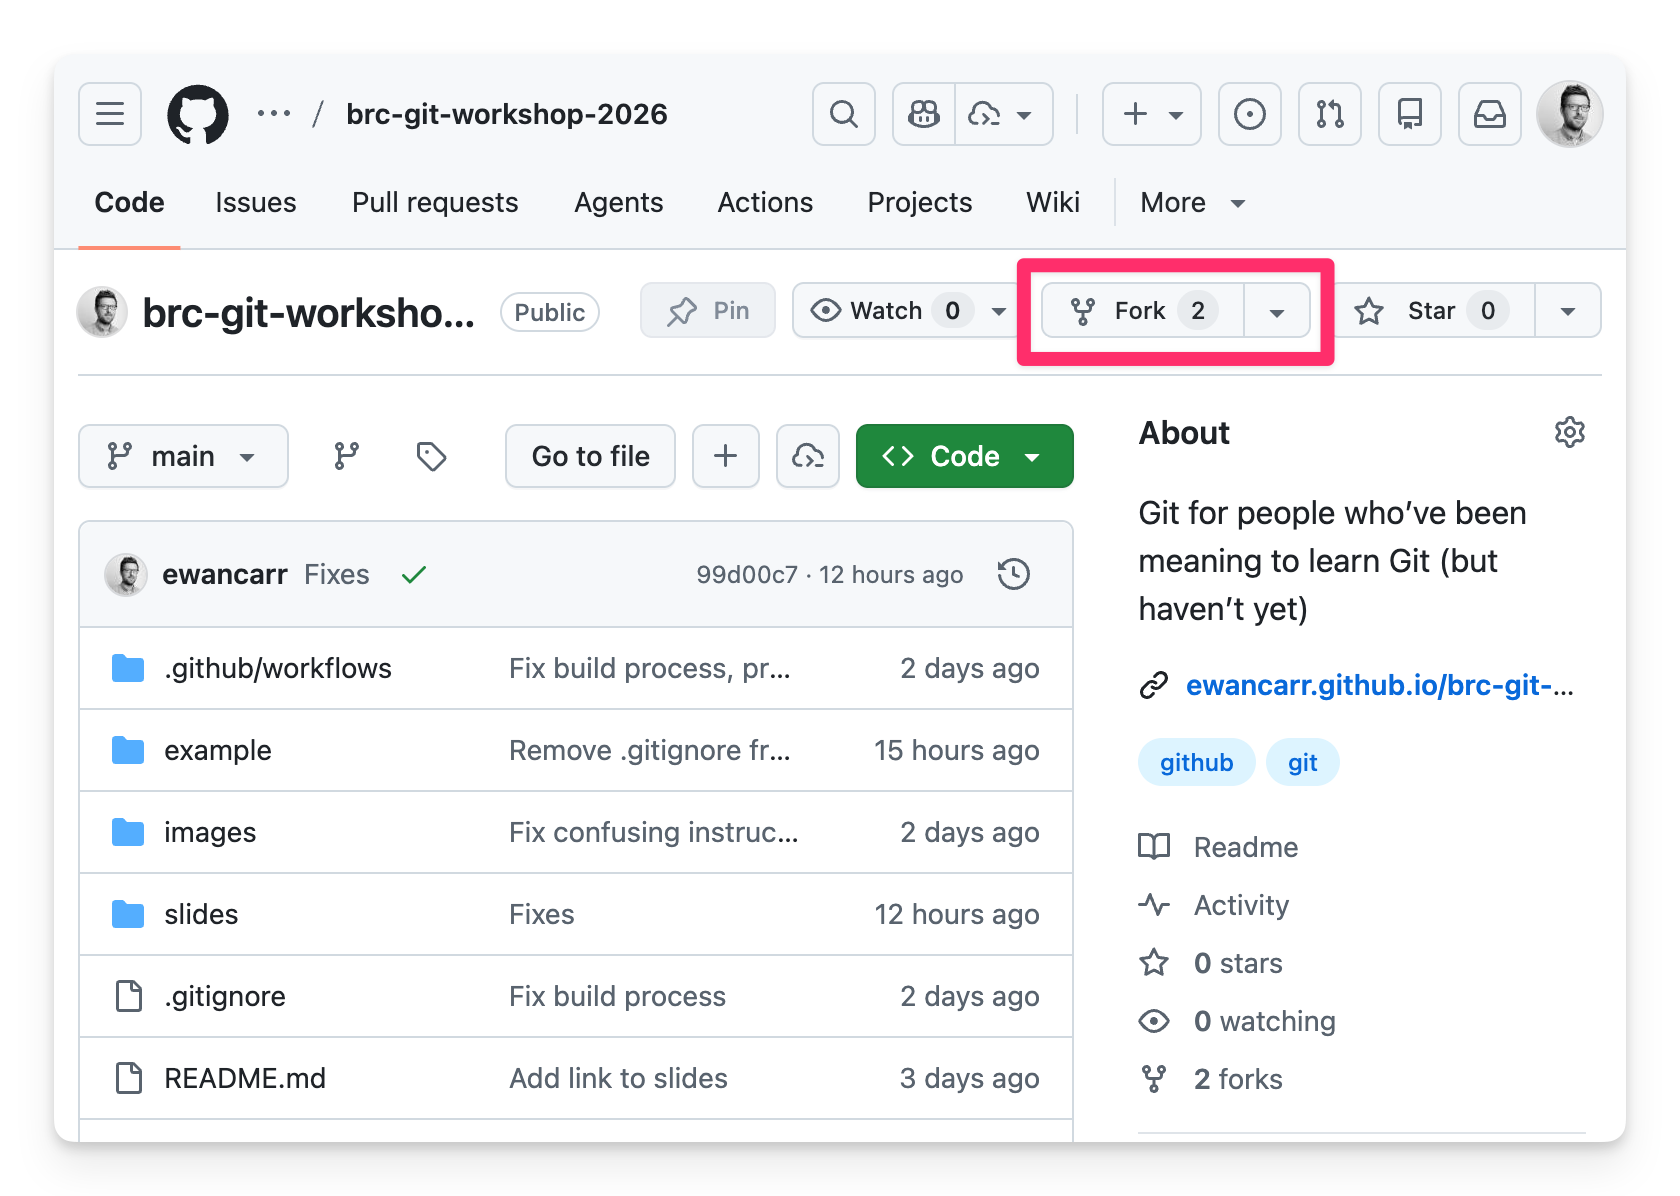
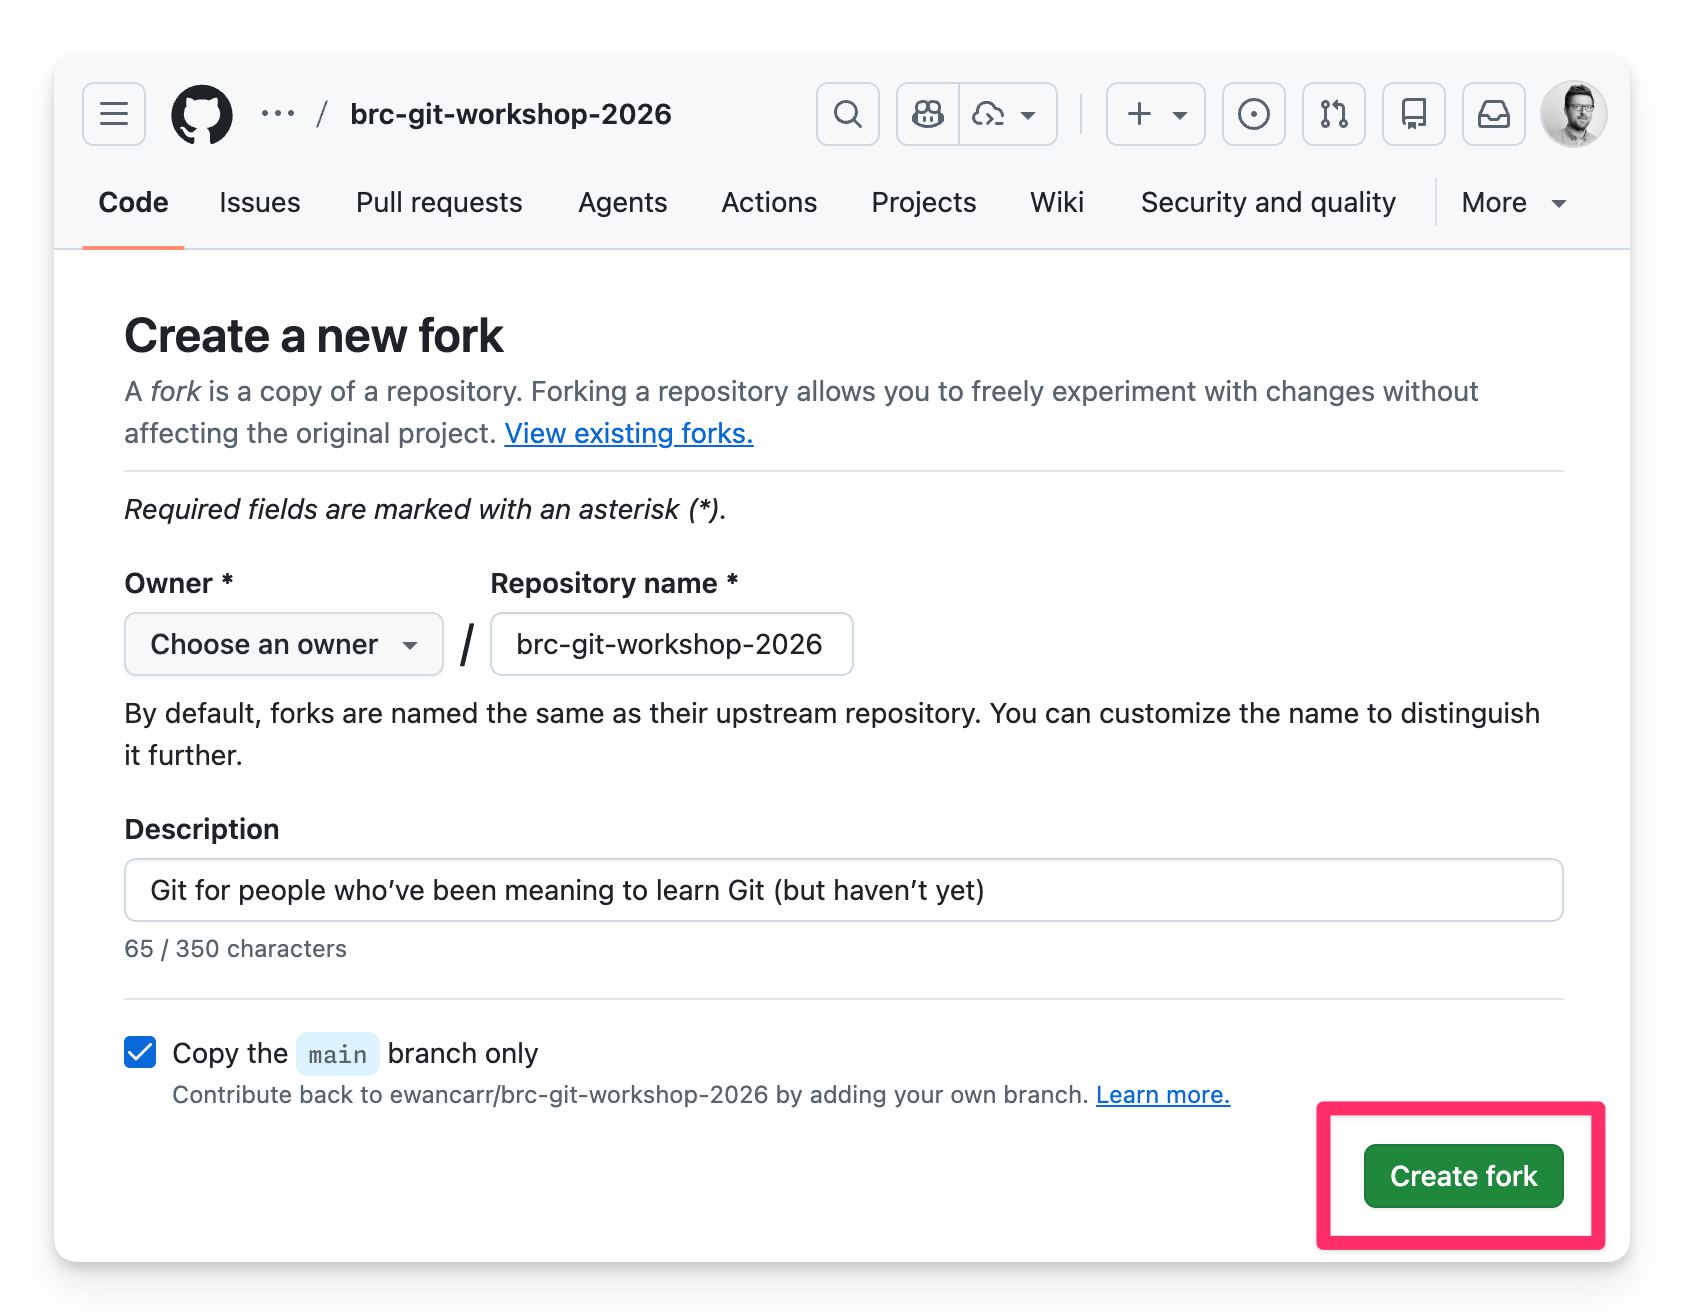
Forks: your own copy of a repository
A fork is your own copy of someone else’s repository — useful when you don’t have write access to the original.
- Fork the repository on GitHub
- Clone your fork from GitHub to your local machine
- Make your changes, commit, and push back to your fork
- Open a pull request to the original repository
We’ll try this in the collaborative exercise.
Where to go next
- Happy Git with R
- Git, GitHub, and RStudio — the best starting point for R users.
- Pro Git
- The definitive Git reference, free online.
- Software Carpentry: Version Control with Git
- A self-paced hands-on lesson for researchers.
- Oh Shit, Git!?
- Plain-English fixes for common mistakes.
- Excuse me, do you have a moment to talk about version control?
- Bryan (2018) — the academic case for version control in research.
5-minute break
Exercises
- Check your setup
- Your first local repository
- Push to GitHub
- Make a change and push again
- Add your name to a shared repository
Appendix: First-time setup
git config — three lines to run once
user.name/user.email- Your identity on every commit
init.defaultBranch-
Optional hygiene: use
maininstead of the oldmasterdefault when you create new repositories from the command line
GitHub Desktop usually sets the important parts for you. These commands are mainly for command-line users who want Git configured explicitly.
Where does .gitconfig live?
| Platform | Location | How to open |
|---|---|---|
| Mac | ~/.gitconfig |
open ~/.gitconfig or any text editor |
| Windows | C:\Users\YourName\.gitconfig |
Notepad, VS Code, or notepad $HOME\.gitconfig in PowerShell |
Note
.gitconfig is a hidden file. To show it: Mac — Cmd+Shift+. in Finder Windows — View → Show → Hidden items
You can edit it directly in a text editor, or use git config --global commands. Both do the same thing.